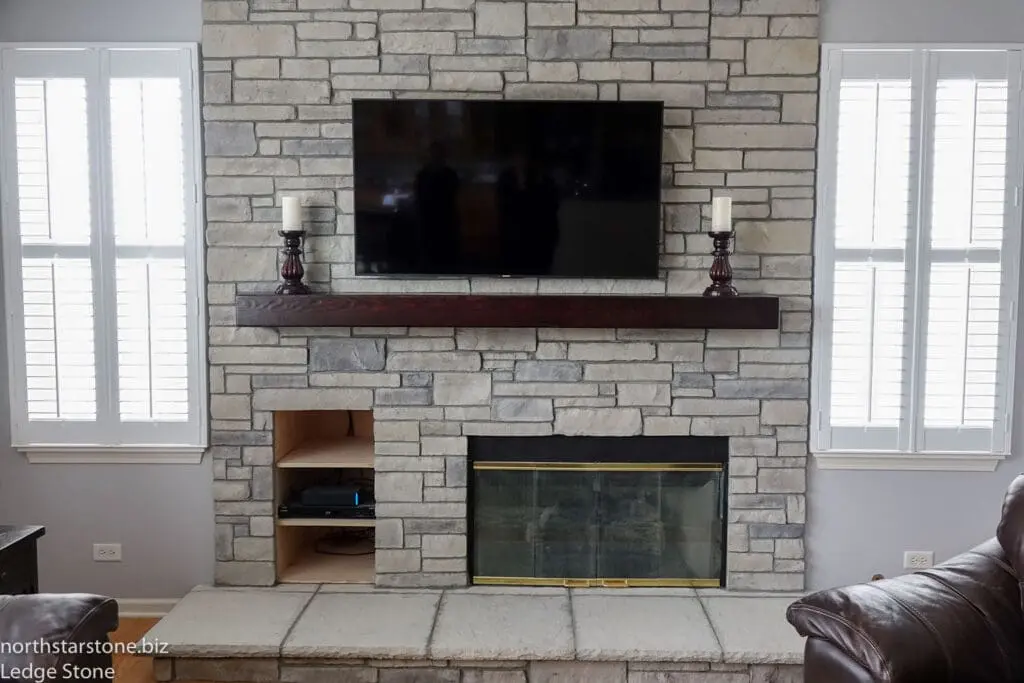
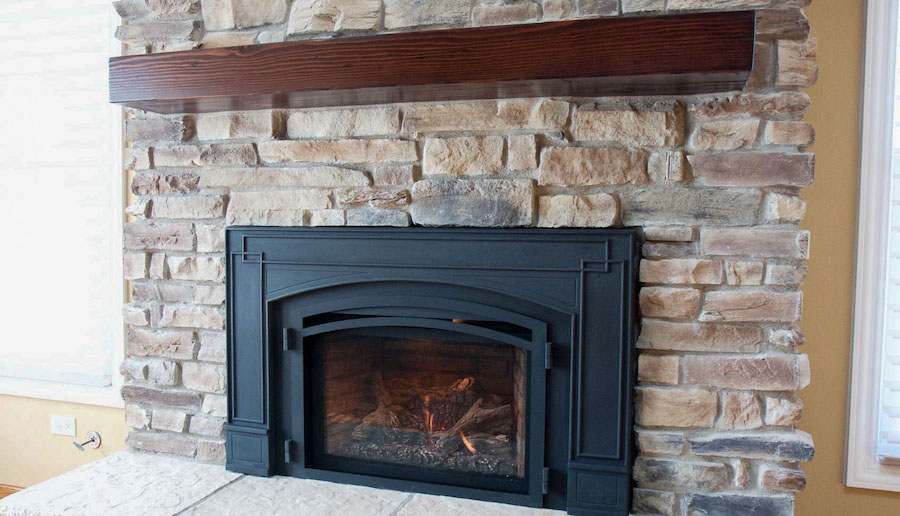
Whether you have lived in your home for decades or you recently moved into a fixer-upper, you probably have renovations on your mind. One of the most eye-catching updates you can do to revamp your living room is stone fireplace makeover. If you want to create a classic and beautiful design, you can attach stone veneer to your fireplace for an instant upgrade. Looking for tips on how to give your fireplace a makeover? We have all the information you need in this detailed guide.
If you’re interested in learning more about our stone veneer options, or you want a professional to do your fireplace upgrade instead, please don’t hesitate to call us at 224-347-4122 or contact us online to request a free estimate.
Why Attach Stone Veneer to Your Fireplace
Before we get into the details of how to complete this project, let’s take a quick look at why stone veneer is one of the best materials you can choose for your fireplace upgrade.
- Lightweight: Although stone veneer looks like real stone, it’s much lighter, which makes it easier to install.
- Requires very little maintenance: This material requires almost no upkeep aside from periodic cleaning.
- Durable: Stone veneer won’t fade or discolor over time and it doesn’t scratch or chip easily, so your fireplace will look great for decades.
- Versatile: There is no shortage of stone veneer styles and design options, so you can create a beautiful fireplace that perfectly fits your aesthetic.
- Budget-friendly option: Stone veneer gives you the high-end look of stone for a price that works with nearly any budget.
We’ve worked with countless local homeowners to help them upgrade their fireplaces with stone veneer and we’re confident you’ll love this material too!
How Do You Attach Stone Veneer to a Fireplace? Frequently Asked Questions
Before you dive into your project, take a look through some frequently asked questions to make sure you’re prepared.
Is Stone Veneer Hard to Install?
Unlike natural stone, which is very difficult to work with, stone veneer is much easier to install. If you are a handy DIYer and you have the right tools for the job, you shouldn’t have issues installing stone veneer on your fireplace.
Can You Put Stone Veneer Over Brick?
Yes! One of the many reasons our customers love stone veneer is because it’s easy to install over existing materials like brick.
However, you can’t trowel mortar directly on the brick, so you have to prep it first using a wet scratch coat. This is a layer of mortar that provides a porous and firm surface so the stone veneer can adhere to the wall. If you have painted brick, you’ll need to use sand or water to blast it or install metal lath to prepare the area instead.
Can You Apply Stone Veneer Right on Plywood?
Yes, you can. You can install metal lath on the plywood and then move forward with the installation using the steps we have outlined below.
What Is Used to Adhere Stone Veneer?
You can find stone veneer adhesives at your local hardware store, which are easy to use and very strong. Alternatively, you can use heavy-duty stone veneer mortar, which we talk more about below.
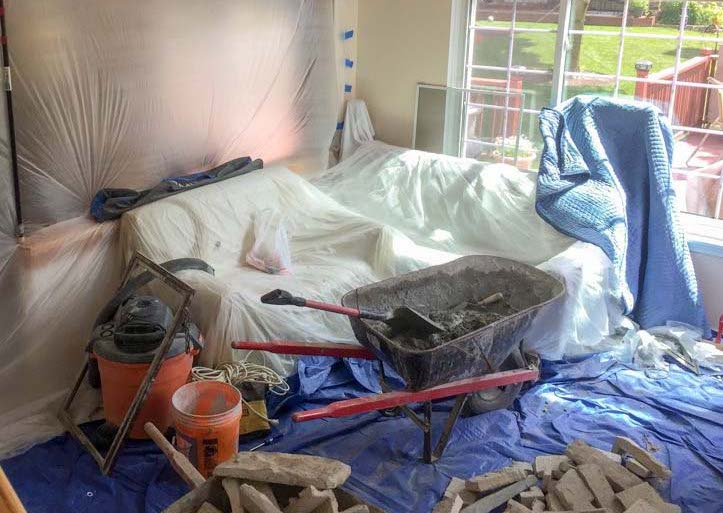
Steps to Take Before the Installation
Before you can start installing stone veneer on your fireplace, you need to make sure you’re prepared. Here are the most important steps to take before getting started.
Get the Right Supplies
The first step is to make a trip to your local hardware store to ensure you have all the necessary supplies for the job. We recommend getting the following before you start your installation:
- 5-gallon bucket
- Drop cloth
- Gloves
- Grout Bag
- Hammer
- Heavy-duty stone veneer mortar
- Level
- Masonry (or other soft-bristle) brush
- Metal lath
- Metal shears
- Mixing paddle
- Moisture barrier
- Paint brushes and rollers
- Roofing nails
- Safety glasses
- Stone veneer in your preferred color and style
- Stone veneer base coat
- Stone veneer joint grout
- Stone veneer sealant
- Tape measure
- Trowel
- Utility knife
Measure Your Fireplace
To make sure you get enough stone veneer to cover your fireplace, you’ll need to take some measurements. The easiest way to do this is by multiplying the height and length of your wall and subtracting the areas that you don’t plan to cover. Then, give yourself room for error by adding in 10%.
Alternatively, our experts can help you decide how much stone veneer you need for your project!
Let the Stone Veneer Acclimate
In order to help your stone veneer acclimate to the temperature inside your home, it’s a good idea to lay the stones flat in your living room for at least 24 hours.
Prepare the Fireplace Area
To ensure a successful installation, you want to make sure that the surface of your fireplace area is free of dust and dirt, which can prevent the stone veneer from sticking in place. Once the area is clean, you can pretreat the walls by adding two coats of moisture barrier to the entire surface. You should also apply two coats to all the cracks, corners, and floor/wall intersections.
Next, install the metal lath around your fireplace area. As a good rule of thumb, the lath should overlap by an inch at the least.
Arrange the Stone Veneer
The final step of the preparation phase is to arrange the stones out on the floor to figure out what kind of pattern you like. We recommend using alternate sizes next to each other to help break up the vertical seams and provide a more natural look.
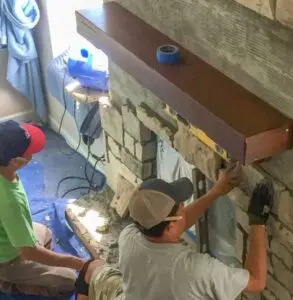
During the Installation
After you’ve finished with all the prep work, you’re ready to start the actual installation process. Here’s how you go about attaching your stone veneer to your fireplace area.
Apply the Base
Start by mixing together the stone veneer base coat. After you have it all mixed, you can apply the base to the substrate by troweling the mortar into the metal lath, keeping it about 1/2-inch thick.
Wait for about 20 minutes, then, while the mortar is still pliable, use a notched trowel to rake grooves horizontally through the base. This texture will make it easier for the stone veneer to attach to the mortar. After making the grooves, let the base coat sit for at least 24 hours before installing the stone veneer.
Install the Stones
After waiting 24 hours, use a paddle mixer to mix the heavy-duty stone veneer mortar. Then, apply a thick and even coat to the back of each stone. For the best results, make sure the mortar is at least 1/2-inch thick.
Starting at the bottom corner of your fireplace, work your way up horizontally, pressing the stone veneer into place and using a twisting motion until excess mortar comes out from the sides of the piece. After placing the stones, use a level and make adjustments as needed.
Once the stone veneer is in place, you can remove excess mortar from the joints and then let the mortar cure for a minimum of 12 hours.
Grout and Caulk the Stones
Next, mix the stone veneer joint grout in your desired color. Cut a small hole at the top of your grout bag and fill it until it’s about half-full. Twist the top and squeeze out any excess air, then fill the joints between the stone veneer.
You can use a rake, brush, or trowel to smooth the joints for a seamless look. You can remove any excess grout with a soft-bristle brush. We recommend working in small sections to prevent rapid hardening of the grout. When you’re done, use the stone veneer sealant to seal around electrical boxes.
Once you clean up, that’s all there is to it! Now, you can sit back, relax, and enjoy your updated fireplace.
Is It Better to Hire a Professional to Attach Stone Veneer to a Fireplace?
After reading through this guide, we hope you have a better idea of how to move forward with attaching stone veneer to your fireplace. While this is a project that many homeowners can do themselves, there are also benefits to hiring a stone veneer expert for the job instead.
For example, you can save time by hiring an expert, as they are experienced in working quickly and efficiently to complete projects like yours. You can also potentially save money on your project by hiring an expert. If you buy the wrong materials or you mess up during the installation, you’ll have to spend more than you originally thought to complete it, which can end up costing more money than hiring a pro from the beginning.
Finally, if your DIY installation doesn’t meet local building codes or follow the manufacturer’s specifications, your stone veneer won’t be covered by a warranty like it would if you hired a professional.
Trust NorthStar Stone for All Your Stone Veneer Needs
Whether you want to order stone veneer for your DIY installation or you want to hire an expert to attach stone veneer to your fireplace, NorthStar Stone is here to help. Get a free estimate for our stone veneer products by calling 224-347-4122 or contacting us online.